

Create and manage sets
Sets are a flexible way of grouping your sources and nodes. Items in a set are references or 'shortcuts' to the original files. You can delete an item from a set without removing it from your project. Refer to About collections (Sets) for more information on sets.
You can create an empty set and then add items to it, or you can create a set based on selected project items.
Sets are stored in the Collections group in Navigation View.
What do you want to do?
- Create a new set and add members
- Select project items and create as a set
- Select project items and add to a set
- Move set members from one set to another
- Copy set members to another set
- Sort the members of a set
- Reorder the members of a set
- Remove members from a set
Create a new set and add members
-
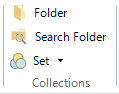
In Navigation View, click Collections to display the Sets folder.
-
On the Create tab, in the Collections group, click Set.
The New Set dialog box opens.
-
In the Name box, enter a name for the set.
-
(Optional) In the Description box, enter a description.
-
Click OK. The new set is added to the Sets folder.
-
In Navigation View, click the new set, and then right-click in List View to see the shortcut menu, and then select Add Set Members. The Select Project Items dialog box opens.
-
Select the sources or nodes you want to add to the set and click OK.

Select project items and create as a set
You can create a set based on selected project items that are displayed in List View or Detail View—for example, find or query results.
-
In List View or Detail View, select the items that you want to create as a set.
-
On the Create tab, in the Collections group, click Set then Create As Set.
The New Set dialog box opens.
-
In the Name box, enter a name for the set.
-
(Optional) In the Description box, enter a description.
-
Click OK.
NOTE To select multiple project items, select the first item, then press and hold CTRL while you select the other items.
Select project items and add to a set
-
In List View or Detail View, select the items that you want to add to a set.
-
On the Create tab, in the Collections group, click Set then Add To Set.
The Select Set dialog box opens.
-
Click the set you want to add the items to.
-
Click OK.
Move set members from one set to another
-
In List View, select the members you want to move from a set.
-
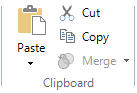
On the Home tab, in the Clipboard group, click Cut.
Keyboard shortcut To cut, press CTRL+X.
-
Click the destination set folder.
-
On the Home tab, in the Clipboard group, click the Paste image.
Keyboard shortcut To paste, press CTRL+V.
Copy set members to another set
-
In List View, select the members you want to copy.
-
On the Home tab, in the Clipboard group, click Copy.
Keyboard shortcut To copy, press CTRL+C.
-
Click the destination set folder.
-
On the Home tab, in the Clipboard group, click the Paste image.
Keyboard shortcut To paste, press CTRL+V.
Sort the members of a set
By default, members of a set are organized alphanumerically by Name in List View but you can
-
Sort members based on a property such as creation or modification date
-
Sort members based on a 'custom' order—you create a custom order by manually reordering the members.
To apply a sort order:
-
Click in List View
-
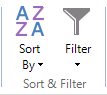
On the Layout tab, in the Sort & Filter group, click Sort By and then click a sort option.
Shortcut Click the column heading for the column that you want to sort by.
NOTE You can select Custom to apply your customized order—refer to Reorder the members of a set.
Reorder the members of a set
You can reorder the members of a set using a 'custom' order—for example, if you want to order the set members by priority or stages of a process.
-
In List View, click the member you want to move up or down in the set.
-
On the Layout tab, in the Sort & Filter group, click Sort By and then click Custom.
-
On the Layout tab, in the Rows & Columns group, click Move Up
 or Move Down
  .
.
NOTE If you subsequently change the sort order for the members of a set, you can easily return to your customized order—on the Layout tab, in the Sort & Filter group, click Sort By and then click Custom.
Remove members from a set
-
In List View, select the members that you want to remove.
-
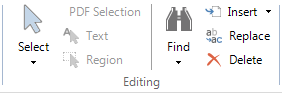
On the Home tab, in the Editing group, click Delete.
The Delete Shortcut dialog box opens.
-
If prompted, click Yes to confirm.
NOTE You can disable deletion confirmation messages in Application Options (Notifications tab).