

Create and work with explore diagrams
This topic explains how to create and work with explore diagrams—a dynamic visualization for exploring the connections between your project items.
What do you want to do?
- Generate an explore diagram
- Change the connections displayed on an explore diagram
- Follow associations in your project by exploring other items
- Copy an explore diagram
- Export an explore diagram
Generate an explore diagram
-
In List View, select the source, node or case you want to explore.
-
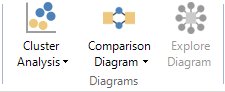
On the Explore tab, in the Diagrams group, click Explore Diagram.
The diagram is displayed in Detail View.
NOTE You can also generate an Explore Diagram while working in a node—refer to Review the references in a node.

Change the connections displayed on an explore diagram
You can choose to show different types of connections on an explore diagram—for example, if you are exploring a source, you may want to see only the nodes that code the source or only the memo links.
To change the type of associated items displayed on the diagram:
-
On the Explore diagram tab, in the Display group, select or clear the check box for the items you want to show or hide.
NOTE: Items can be a member of a relationship and they can be coded at a relationship. Clearing the Relationships check box hides an item's membership in relationships, but does not hide coding at relationships.
Follow associations in your project by exploring other items
You can select an item in an explore diagram and then refocus the diagram to see that item's associations—this allows you to follow the connections in your project.
- In the explore diagram displayed in Detail View, click the source, node or case that you want to explore.
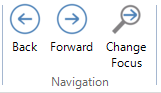
- On the Explore diagram tab, in the Navigation group, click Change Focus.
A new explore diagram replaces the original diagram in Detail View.
- Once you have explored any item on an explore diagram, your history is remembered and you can use the Back and Forward buttons on the ribbon to navigate your focus history. NVivo remembers a history of up to ten steps through the diagram.
Copy an explore diagram
Explore diagrams cannot be saved in your project. However, you can copy and paste explore diagrams as an image into many destinations, for example a memo, email or Word document.
-
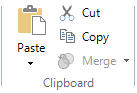
On the Home tab, in the Editing group, click Select and then click Select All.
-
On the Home tab, in the Clipboard group, click Copy.
The diagram is copied to the clipboard.
NOTE You can use the keyboard shortcuts Ctrl+A to select all, and then Ctrl+C to copy.
Export an explore diagram
You can export an explore diagram as an image file (.jpg, .bmp, .gif, .png, .tif).
-
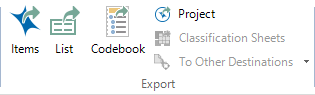
On the Data tab, in the Export group, click Items.
The Save As dialog box opens.
-
Choose a location to save the file.
-
In the File name box, review the name that NVivo proposes for the exported file, and change it if necessary.
-
In the Save as type box, choose the file format for the exported file.
-
Click Save.