

Using 'Go To'
When you are working in a source or node, you can use 'Go To' to jump to a specific location—for example, a page in a document, an annotation or a row in an audio transcript.
What do you want to do?
- Jump to a specific location using Go To
- Using 'Go To' in different source types
- Learn more about the Go To options
Jump to a specific location using Go To
-
Open the source or node.
-
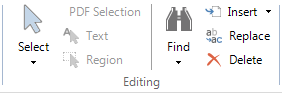
On the Home tab, in the Editing group, click the arrow next to Find, and then click Go to.
Keyboard shortcut CTRL G to open the Go to dialog box.
The Go to dialog box opens.
-
In the Go to what box, select the type of location you want to go to.
-
Enter the location.
-
Click OK.

Using 'Go To' in different source types
If you are working in a source, the 'Go To' options vary depending on the source type:
| Source type | Go to |
|
Documents, memos and externals |
A specific page, paragraph, character position, 'see also' link or annotation |
| PDFs | A specific page, 'see also' link or annotation |
| Datasets
(NVivo Pro and Plus only) |
A specific record ID, record number, 'see also' link or annotation |
| Pictures
(NVivo Pro and Plus only) |
A specific picture log row, 'see also' link or annotation |
| Audio or video
(NVivo Pro and Plus only) |
A specific transcript row, 'see also' link or annotation |
If you are working in a node, the 'Go To' options vary depending on the tab:
| Node tab | Go to |
|
Reference |
A specific source, 'see also' link or annotation |
| Text | A 'see also' link or annotation |
| A specific page, 'see also' link or annotation | |
| Dataset
(NVivo Pro and Plus only) |
A specific record ID, record number, 'see also' link or annotation |
| Picture
(NVivo Pro and Plus only) |
A specific picture log row, 'see also' link or annotation |
|
Audio or video (NVivo Pro and Plus only) |
A specific transcript row, 'see also' link or annotation |
Learn more about the Go To options
Annotation number Select this option to go to a specific annotation. Every source annotation has a unique number—you can see these numbers in the Annotations tab in Detail View. You can also see annotation numbers, if you chose to include annotations when you print sources and nodes.
Character position number Select this option to go to a specific character position within a document, memo, external. Each character or space that you type in a document, memo or external has a sequential position number.
Dataset record ID Select this option to go to a specific dataset record. Each record in a dataset is assigned a unique record number. You can see these numbers in the ID field (column) in the dataset. Dataset record IDs are included when you print a dataset source.
Log row Select this option to go to a specific picture log row. Each entry in a picture log is assigned a unique row number. You can see these numbers in the left-hand column of the picture log. Picture log row numbers are included when you print the picture log.
Page Select this option to go to a specific page in a document, PDF, memo or external source. You can see page numbers in the status bar when a PDF source is open in Detail View or when you are viewing PDF content in a node.
Paragraph number Select this option to go to a specific paragraph in a document, memo or external. Each paragraph in a document, memo or external is assigned a sequential number. A paragraph is defined as text or images between two carriage returns. Paragraph numbers are not visible when the source is open in Detail View—you can see the paragraph numbers, if you choose to include them when you print a source.
See Also link number Select this option to go to a specific 'see also' link. Every source 'see also' link has a unique number—you can see these numbers in the 'See Also' Links tab in Detail View. You can also see 'see also' link numbers, if you chose to include 'see also' links, when you print sources and nodes.
Source Select this option (only available in Node Reference View) to go to a the coding references for a specific source (for example, the 2nd, 3rd or 4th source) displayed in the Reference View.
Time (hh:mm:ss) Select this option, to position the seek slider at a specific point in time on the timeline in an audio or video source. The transcript, if present, scrolls to display the associated transcript entries.
Transcript row Select this option to go to a specific audio or video transcript row. Each entry in a transcript is assigned a unique row number. You can see these numbers in the left-hand column of the transcript. Transcript row numbers are included when you print an audio or video transcript.