

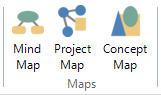
Create a project map
This feature is available in NVivo Pro and Plus editions. Learn more
You can use project maps to explore your project or present your findings. Refer to About project maps for more information.
What do you want to do?
- Understand the project map Detail View
- Create a new project map
- Add multiple associated items to the canvas
- Change the layout
- Change the connector display
Understand the project map Detail View
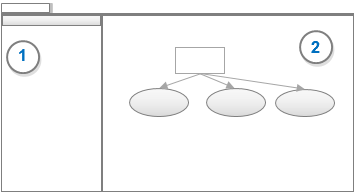
1 The associated data pane. Select an item on the map then click Show Associated Items to refresh the data displayed in this pane. This pane can be hidden to give more space to work with your map.
2 The map canvas.
When the map is open in Detail View, you can use the horizontal and vertical scroll bars to move around the map. You can use Zoom to focus on an area of the map, or Zoom out to see the whole map at a reduced size.
If you want to change the map, you must enter edit mode.
TIP: You may like to undock Detail View and display it in a separate window to make more room when you're working with maps.

Create a new project map
-
On the Explore tab, in the Maps group, click Project Map.
The New Project Map dialog box opens.
-
In the Name box, enter a name for the project map.
-
(Optional) In the Description box, enter a description.
-
Click OK. The project map canvas displays in Detail View.
-
On the Project Map tab, click Add Project Items.
-
On the left, click the folder name that contains the project item you want to add.
-
On the right, select the check boxes for the project items you want to add to the map.
-
Click OK. The project item displays on the canvas.
-
Select one or more items and on the Project Map tab, in the Items group, click Show Associated Items. The Associated Items pane displays.
-
Select an associated item and drag it to the canvas. The item is added to the project map with a connector to the original project item.
NOTES
-
Project items are linked to your data—you can double-click to open in Detail View.
-
You can change the layout of the project map to best present your data.
-
You can use keyboard shortcuts to work with maps.
Add multiple associated items to the canvas
-
Select one or more items on the map.
-
On the Project Map tab, in the Items group, click Show Associated Items. The Associated Items pane displays all available associated items.
-
Add associated items to the canvas by doing any of the following:
-
Right-click on an item type (Children, Sources coded, Cases coding, etc) and select to add all of the items of that type to the map.
-
Expand an item type and right-click on a sub-folder to add all items in that folder to the map.
-
Expand a sub-folder, then press and hold CTRL while you click to select multiple items—without releasing the mouse button, drag the items onto the canvas.
Change the layout
You can manually arrange project items on the map or you can use of the automatic layout options to best present your data. Refer to Change the layout of shapes and connectors for more information on presenting your map layout.
You cannot resize or change the format of individual items or connectors in a project map.
Change the connector display
To show or hide the labels on the connectors in your project map:
-
On the Project Map tab, in the Connectors group, select or clear the Connector Labels check box.
To show or hide the connectors in your project map:
-
On the Project Map tab, in the Connectors group, select or clear the check box for the project item type you want to show or hide connectors for. The project item is still displayed on the map—only the connector is shown or hidden.