

Create a picture log
This feature is available in NVivo Pro and Plus editions. Learn more
A picture source contains a picture and optionally contains a log. You can use the log to record notes, ideas or comments to describe the whole or part of a picture. These are referred to as log entries. You can create log entries or import them.
What do you want to do?
- Create a log for the picture
- Create a log for a region of the picture
- Import log entries
- Define a region for a log entry
- Show/hide the picture log
- Delete log entries
- Filter log entries
- Move log entries up or down
Create a log for the picture
-
Make sure you are in edit mode.
-
Click in the Content column.
-
Enter your notes or comments.

Create a log for a region of the picture
-
Make sure you are in edit mode.
-
Drag the mouse pointer to select a region of the picture.
-
On the Layout tab, in the Rows & Columns group, click Insert and then select Insert Row. The coordinates are displayed in the Region column.

-
Enter your notes or comments in the Content column.
NOTE To highlight the corresponding region in the picture, click on the full row.
Import log entries
You can import log entries formatted in Word (.doc, .docx), rich text (.rtf), or plain text (.txt) into picture sources. A line in a text file or a paragraph in a document file will be imported as one log row. If there are existing entries in the picture source, the imported log entries will be positioned after the last existing entry.
To import log entries:
-
Make sure you are in edit mode.
-
On the Picture tab, in the Import group, click Log Rows.

The Import Log Entries dialog box opens.
-
Locate and select the document or text file containing the log entries.
-
Click Open.
If there are existing entries in the source, you will be asked to confirm the import. Click OK to confirm.
NOTE
-
You cannot import log entries formatted in a table. Change the table into paragraph form before importing.
-
NVivo tries to detect the file encoding used in the file. If you cannot import the data correctly, try using a different file encoding.
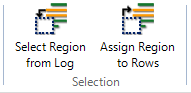
Define a region for a log entry
You can select a region of a picture and set the coordinates to a log entry row. This can be useful when you import log entries and then want to assign them to related areas of the picture.
-
Make sure you are in edit mode.
-
Drag the mouse pointer to select a region of the picture.
-
Click the Region column where you want to set the coordinates of the selected region.
-
On the Picture tab, in the Selection group, click Assign Region to Rows.
NOTE
-
If you have not clicked out of the selected region after setting the region coordinates, you can still adjust the region size by dragging the handles and clicking Assign Region to Rows again.
-
To highlight the corresponding region in the picture, click on the full row .
Show/hide the picture log
-
On the Picture tab, in the Display group, click Log.
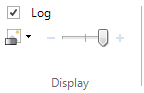
NOTE Hiding the log for a picture source will only persist for the currently open project. Once the project is closed, the setting reverts back to default—showing the log.
Delete log entries
-
Make sure you are in edit mode.
-
Select the row you want to delete.
-
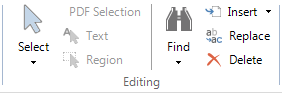
On the Home tab, in the Editing group, click Delete.
Keyboard shortcut Press DELETE.
-
Click OK to confirm.
Filter log entries
You can filter log entries—refer to Applying filters for detailed information.
Move log entries up or down
-
Make sure you are in edit mode.
-
Select the log entry you want to move.
-
On the Layout tab, in the Rows & Columns group, click
 Move
Up or
Move
Up or  Move
Down .
Move
Down .
Keyboard shortcut To move up, press CTRL+SHIFT+U. To move down, press CTRL+SHIFT+D.
NOTE You cannot move log entries if a filter is on. To clear the filter—on the Layout tab, in the Sort & Filter group, click Filter, and then click Clear All Row Filters.