

Create a chart
You can use charts to explore your project or present your findings. This topic explains the ways you can create a chart.
What do you want to do?
Create a chart using the Chart Wizard
-
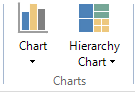
On the Explore tab, in the Charts group, click the Chart image.
-
Follow the steps in the Wizard, and then click Finish.
The chart is generated and displayed in Detail View. You can use the options on the Chart tab to change the appearance of your chart—refer to Change the appearance or content of a chart for more information.
NOTE For more information on charts, refer to About charts.

Other ways you can create a chart
You can create charts while working on other areas of your project—for example, you can create a chart when you are:
-
Reviewing references in a node—for example, what are the main sources coded at rising sea levels?
-
Considering the coding references in a source—for example, what are the main themes coding Panel Discussion on Water Quality Regulations?
To create a chart while working in your project, select the source, node or matrix in List View, and then click the arrow below Chart in the Charts group on the Explore tab to see the available chart options.
You can also display a chart by clicking the Chart tab when you are viewing
-
The results of a matrix coding query—refer to About node matrices for more information.
-
A Twitter dataset—refer to Approaches to analyzing Twitter data for more information.